Using Julia
Table of Contents
Introduction
Julia is a flexible dynamic language that is intended for scientific and numerical computing. IJulia is a Julia language backend that allows users to use the Julia language in Jupyter's graphical notebook interface.
Accessing Open OnDemand
The first step to working with IJulia on ISU HPC clusters is to connect to Open OnDemand for the desired cluster. Click here for the ISU HPC Open OnDemand guide. For convenience, the links to the current, as of this guide, ISU HPC cluster Open Ondemand interfaces are provided below. Note: To connect to Open OnDemand, a user must either be on the ISU network or connected via the ISU VPN.
Launching JupyterLab
Once connected to Open OnDemand, a user will have to start a JupyterLab session. Follow the ISU HPC JupyterLab guide here to launch and connect to JupyterLab.
Installing Julia
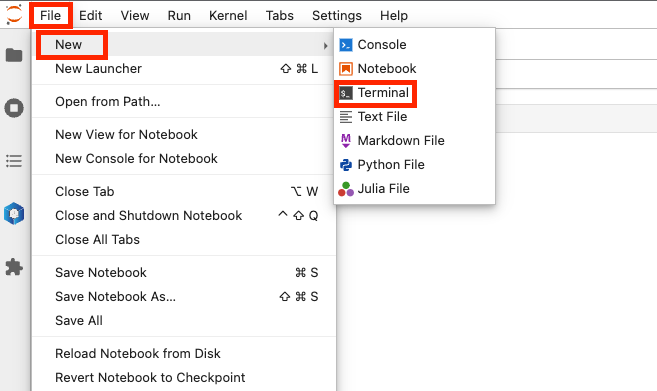
Once connected to the JupyterLab instance, click File > New > Terminal to open a shell.
Choose a location to download and build Julia. This example will use "/work/mygroup/userdir" as an example path:
export JULIAROOTDIR=/work/mygroup/userdir
Change to the directory and download the Julia source from github:
cd $JULIAROOTDIR
git clone https://github.com/JuliaLang/julia.git
Change to the git directory that was downloaded:
cd $JULIAROOTDIR/julia
Checkout the git branch for the version of Julia to be installed. This example will use version 1.7.3:
git checkout v1.7.3
Load the modules required to build Julia:
module load gcc python perl wget m4 cmake pkgconf
Build Julia with the make command. Note: Depending on the environment, this can take a significant amount of time. The real time to run for this example was over 13 minutes.
make
Launch Julia:
$JULIAROOTDIR/julia/julia

From the Julia prompt, install IJulia:
using Pkg
Pkg.add("IJulia")
Launching a Julia Notebook
After adding the IJulia package, a Julia kernel of the version you installed should appear in your list of available notebooks and consoles on the Jupyter Launcher. To access the launcher, click File > New Launcher.

Note: While it should display without intervention, if it is not, opening a new JupyerLab session may resolve the issue.
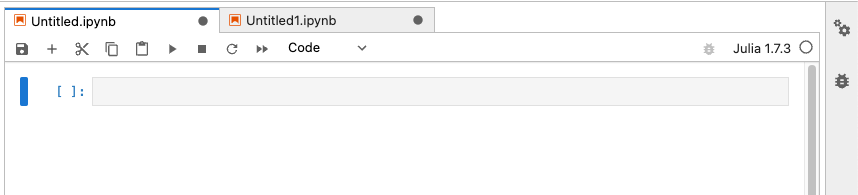
To open a Julia notebook interface, simply click on the corresponding notebook tile. This will open a blank notebook tab.
To test, try running the following three cells:
#Print the string 'testing println'
println("testing println")
#Load the package 'Plots' - First time running this will take a while while it installs
using Pkg
Pkg.add("Plots")
#Use the Plots package to make a simple test graph
using Plots
x = 1:10; y = rand(10);
plot(x,y, label="Random")
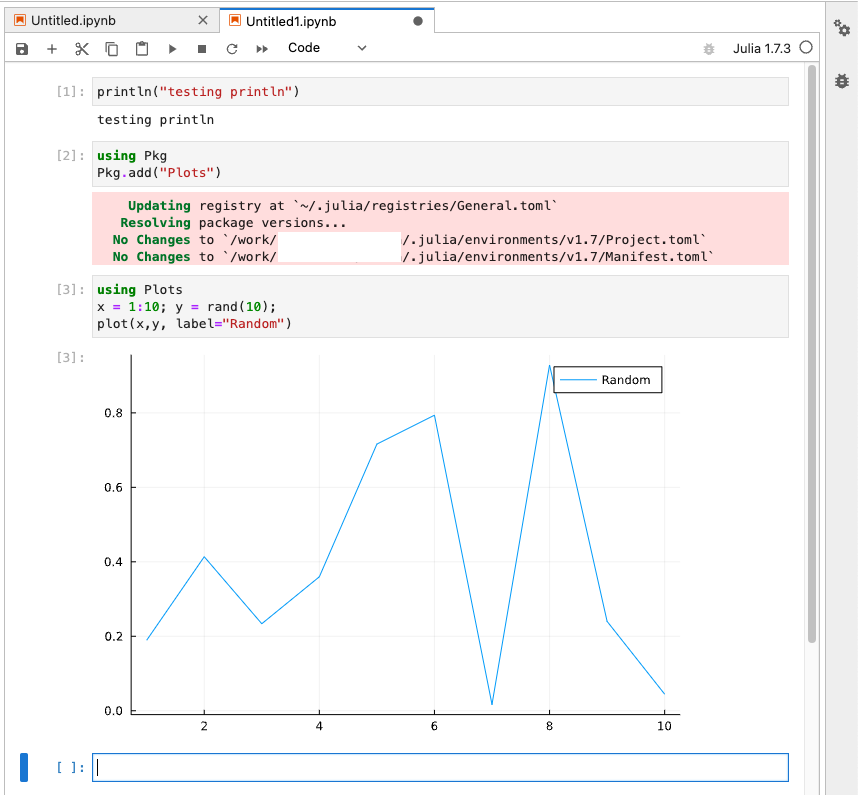
Note: On the first run of Pkg.add("Plots") it will take a while to pull all of the dependancies and install them. The notebook will have considerably more output than what is shown in the above image.