- Home
- About
- Research
- Education
- News
- Publications
- Guides-new
- Guides
- Introduction to HPC clusters
- UNIX Introduction
- Nova
- HPC Class
- SCSLab
- File Transfers
- Cloud Back-up with Rclone
- Globus Connect
- Sample Job Scripts
- Containers
- Using DDT Parallel Debugger, MAP profiler and Performance Reports
- Using Matlab Parallel Server
- JupyterLab
- JupyterHub
- Using ANSYS RSM
- Nova OnDemand
- Python
- Using Julia
- LAS Machine Learning Container
- Support & Contacts
- Systems & Equipment
- FAQ: Frequently Asked Questions
- Contact Us
- Cluster Access Request
Using ANSYS RSM
Introduction
ANSYS Remote Solve Manager (RSM) is used by ANSYS Workbench to submit computational jobs to HPC clusters directly from Workbench on your desktop. This allows you to take advantage of much more computing power that you likely have on your desktop or laptop computer. What's more, you don't have to write sbatch scripts on the cluster, or manually transfer files between your desktop computer and the cluster. RSM takes care of those details automatically. In fact, some types of analysis, such as coupling mechanical FEA and fluid dynamics, are difficult to set up to run on the clusters without RSM. Here is a video demonstrating how ANSYS Workbench can be used to submit jobs to RSM:
https://www.youtube.com/watch?v=lgGID55Lwzg&feature=youtu.be
NOTE: ANSYS HFSS (Electronics Desktop) does not yet support SLURM. We expect it should be available in the first release of 2021.
Prerequistes
- You must have ANSYS version 2020 R2 or later installed. The ISU HPC clusters all use the Slurm job scheduler. The ability to communicate with Slurm was added in ANSYS 2020 R2. You may need to contact your department's IT staff for assistance installing the correct version of ANSYS.
- You must be connected to the campus network over the ISU VPN, even if you are on campus.
- You must have an account on one of the ISU Clusters. See here for info on how to get an account: https://www.hpc.iastate.edu/faq#Access
Launch the RSM Configuration Tool
The RSM configuration tools are installed automatically when you install ANSYS 2020R2. Launch the RSM Configuration tool from your desktop:
On Windows:
Select Start > ANSYS 2020 R2 > RSM Configuration 2020 R2.
You can also launch the application manually by double-clicking Ans.Rsm.ClusterConfig.exe in the [RSMInstall]\bin directory.
On Linux:
From the command line, run the applications <RSMInstall>/Config/tools/linux/rsmclusterconfig script.
Configuring RSM
The main RSM Configuration window looks like this:
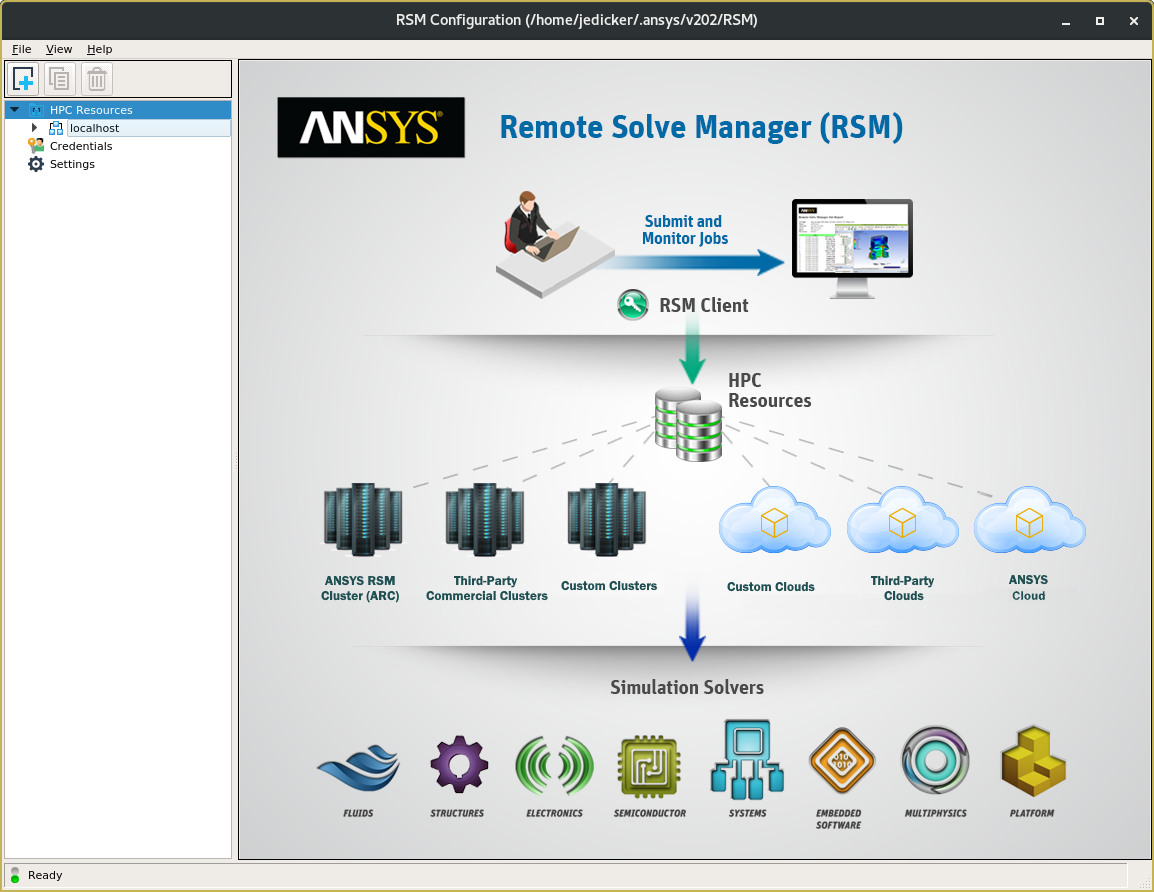
Main RSM Configuration window
Creating an HPC Resource
First, we need to create an HPC Resource that defines a cluster. Click the blue plus sign to open the HPC Resource pane. In the fields, enter these values:
- In the Name field, enter the name you want to call this HPC resource. For example, nova.
- In the field HPC type, select SLURM from the dropdown menu. The ISU clusters use the SLURM job scheduler.
- For the Submit host, enter the RSM submit host according to the cluster you are using. The submit hosts are as follows:
RSM Submit hosts for the ISU HPC clusters Cluster RSM Submit Host nova hpc-nova-rsm.its.iastate.edu
Note: This host will not be available till after Nov. 10, 2020.
- In the field labeled SLURM job submission arguments (optional), enter: -N 1 -n 16 -t 4:00:00
NOTE: The values specified here are just for testing the submit setup. The values for number of hosts, number of processors, and maximum time will need to be changed once you begin submitting actual jobs. - Leave the box checked that is labeled Use SSH protocol for inter and intra-node communication (Linux only).
- Click the button labeled: Able to directly submit and monitor HPC jobs
After entering the fields, click the Apply button at the bottom of the page to save these settings. The final settings should look something like this:
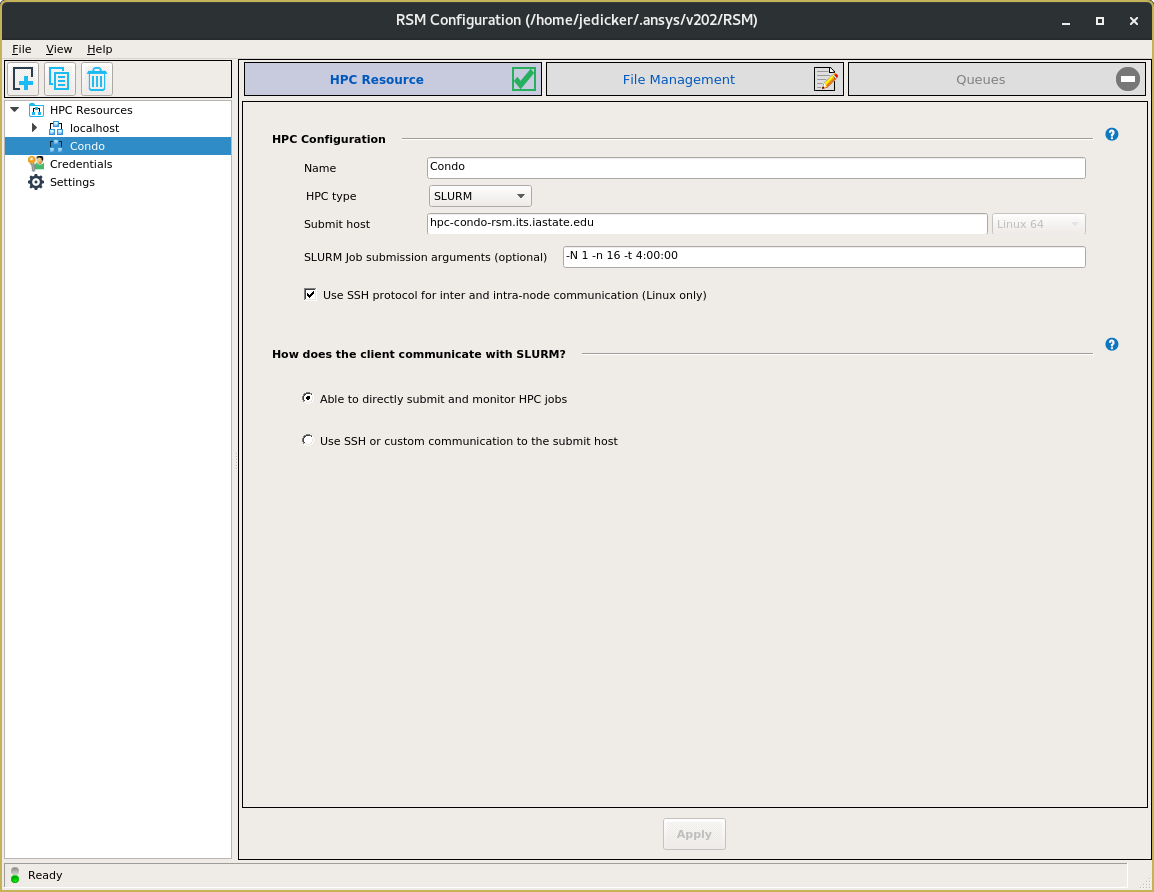
Sample HPC Resource configuration settings (for Condo cluster)
Configuring File Management
After you have saved the HPC Resource, open the File Management pane. Apply these settings:
- Select the button labeled: RSM internal file transfer mechanism
- This will open an additional field labeled: Staging directory path on cluster
- In the Staging directory path on cluster field, enter the path to where you would like to have RSM store files it uses for your computational jobs. It is not advisable to use your home directory for this. On the Nova cluster, a good location would be under a directory called ansys/staging in a directory in your group's work directory that you have access to. Hpc-class users should use their directory in /ptmp.
- Under the section labeled HPC Side File Management, check the button labeled: HPC staging directory
- Check the box labeled: Keep job files in staging directory when job is complete. This can be useful for troubleshooting problems.
After filling out the form, be sure to click the Apply button at the bottom of the page to save these settings. The File Management settings should look similar to the following (your Staging directory will be different):
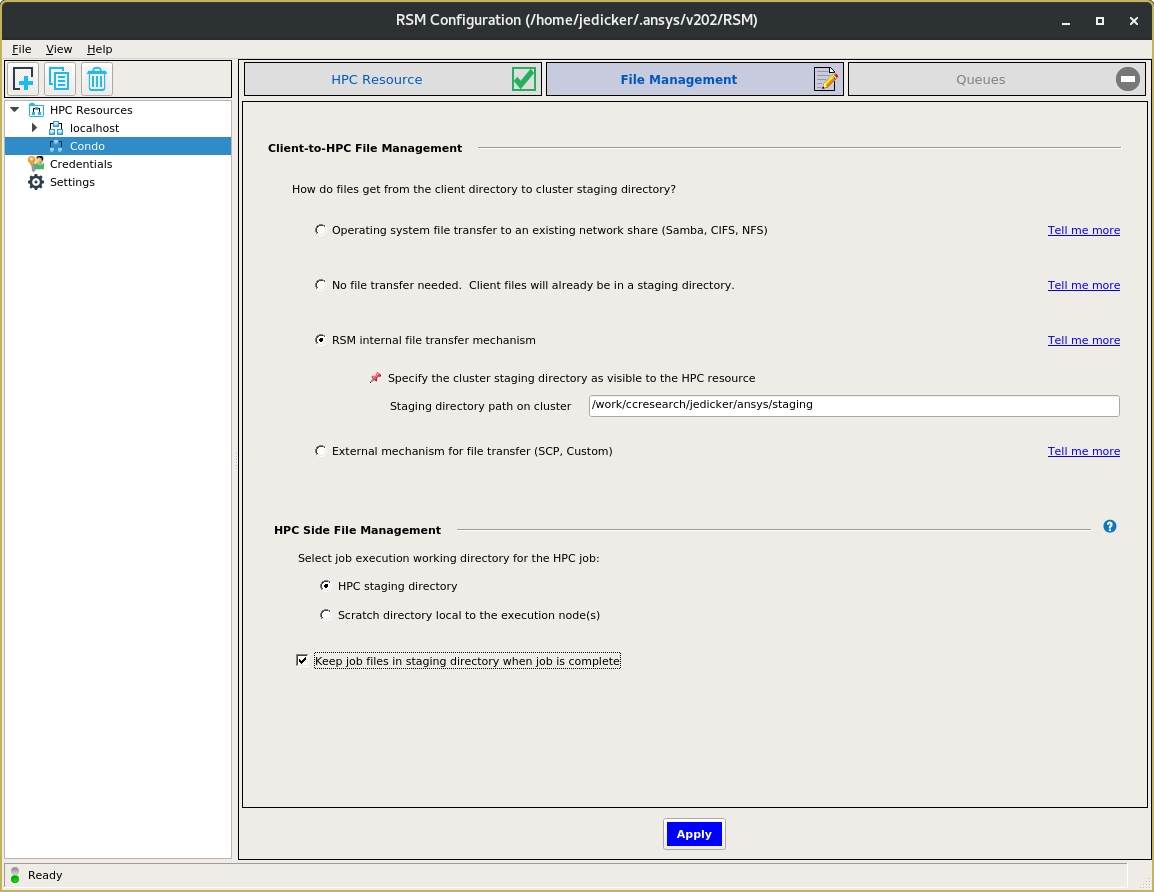
Sample File Management settings
Configuring Queues
Now select the Queues pane at the top right of the RSM Configuration page. From this page, the RSM will log in to the RSM submit host and query Slurm for the list of available queues. When you first open the page, there will be no queues listed. Click on the icon with the arrows in the circle to have RSM search for the queue names.
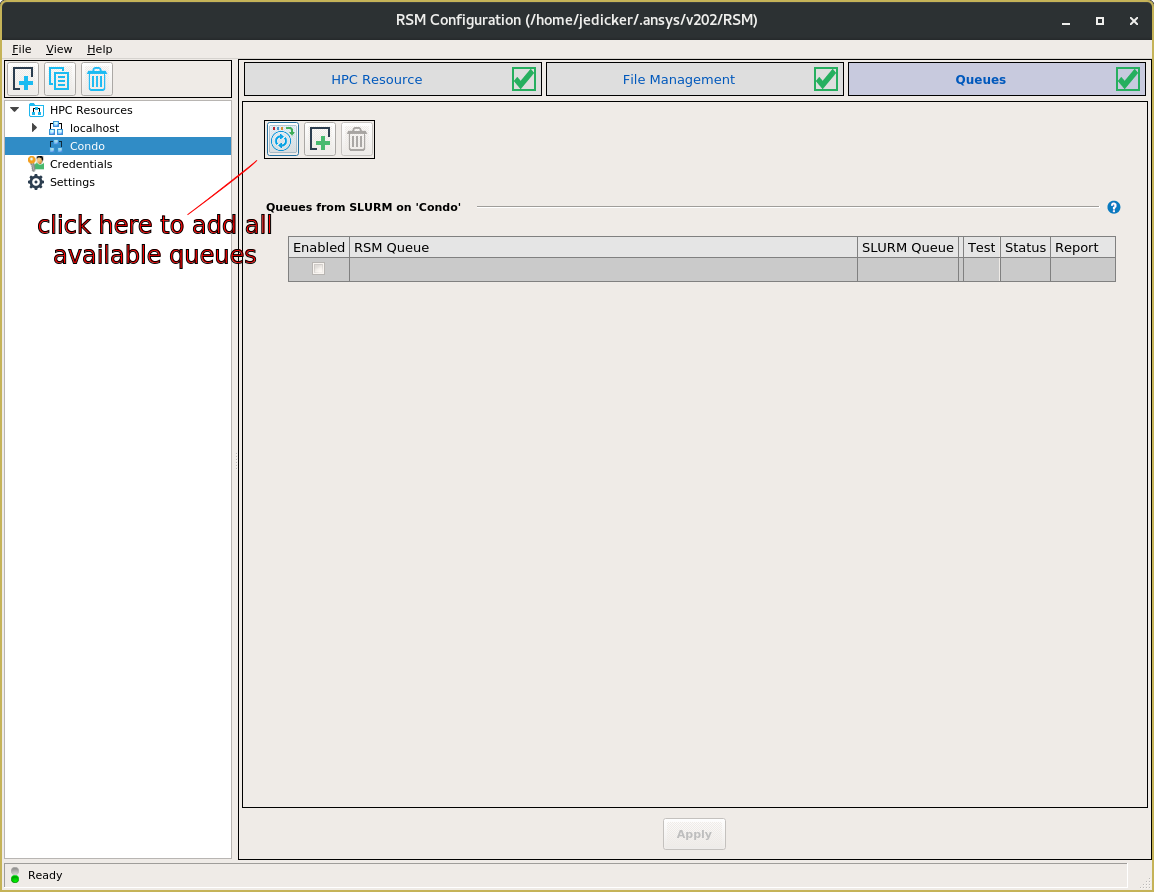
The initial Queues page with no queues defined
The RSM Configuration tool will prompt you for the username and password you use to log in to the cluster. Note that the RSM submit hosts do not support the Google Authenticator two-factor authentication used by the Nova cluster. (this is why you must be connected to the ISU VPN beforehand). You will only need to enter your ISU Netid and password. You should see this:
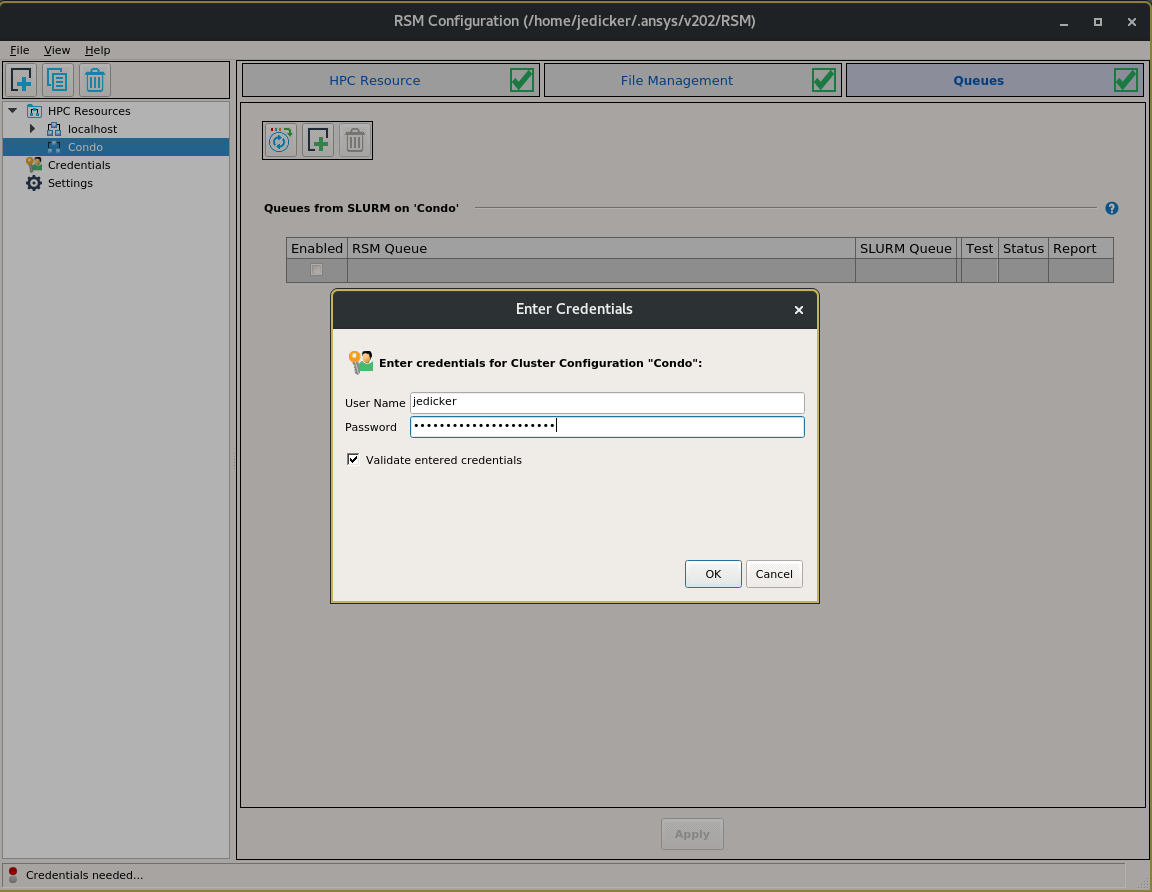
The RSM Configuration tool will ask for your username and password.
If your login credentials succeed, RSM should import the list of available queues as shown below. The account name and password you entered will be saved in the Credentials list, which will be discussed below. Note that the cluster's default queue is usually enabled automatically. You will need to enable any non-default queues you intend to use for your jobs by checking the appropriate box in the Enabled column.
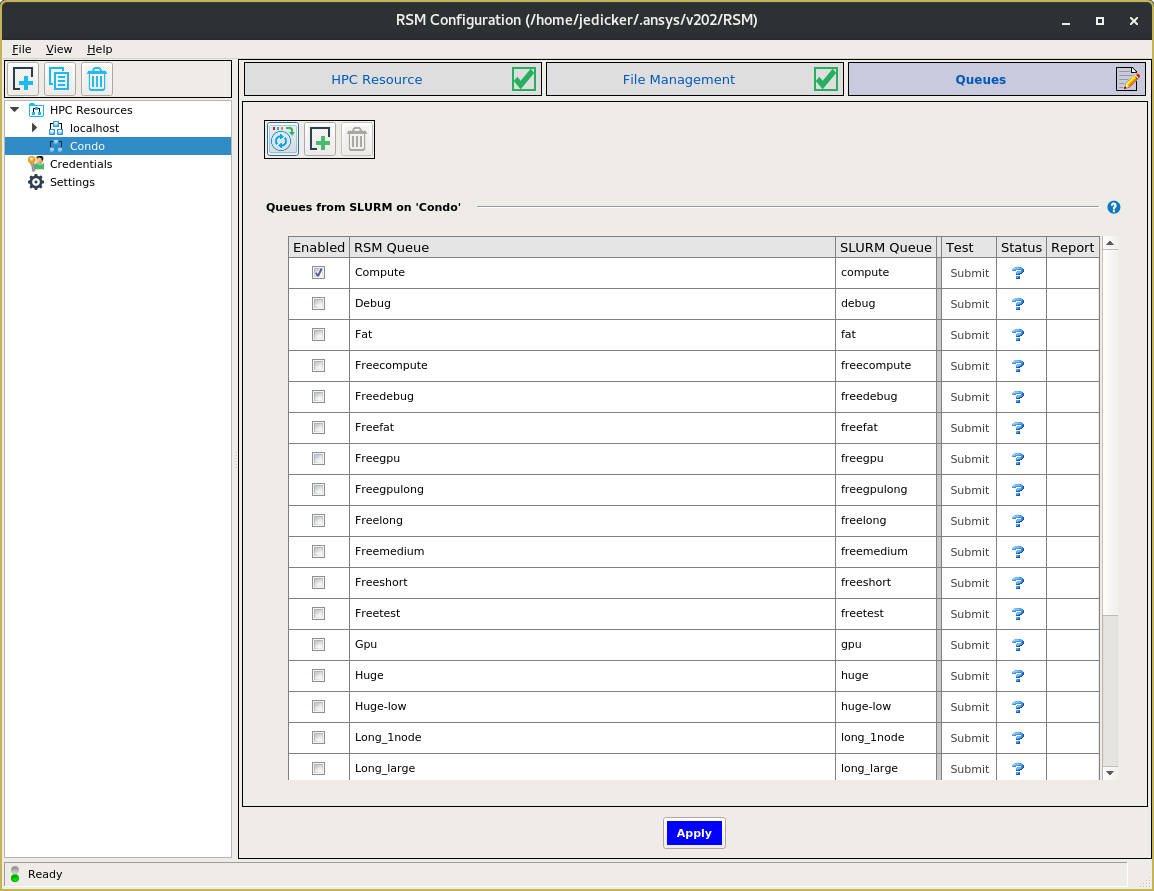
The imported list of queus
If the importing of queues is successful, click on the Apply button at the bottom of the page to save this configuration.
Testing the Configuration
Next, we want to test the configuration. This step submits a test job to the cluster to ensure that all the settings are correct. In the Test column, there should be a button labeled Submit for each queue. To test a particular queue, click its Submit button. This should take about a minute or so to complete. If the test succeeds, a green check mark will be added to the Status column as shown below. Again, click the Apply button at the bottom of the page to save this configuration.

Successful Submit job test
Adding Account Credentials, Changing Passwords, Applying Accounts to Clusters
Click on Credentials the left pane. This should list the account you used when you imported the queues for the cluster. For most users, you will only have your own username credential listed. RSM uses this account and password to log in to the cluster and submit jobs. If you need to add a new credential, click on the plus sign and enter a new account name and password. If you need to change the password for a account, click on the account name, then click the icon with the keys. You will be prompted to enter a new password for that account. Also notice that each credential can be applied to a cluster by checking the box next to a cluster name in the right pane labeled Apply to:.

Account Credentials pane